Access control implements the principle of least privilege that allows users and agents to receive only the permissions they need to do their work.
User Management
Add, manage, and remove users in your organization through the Settings panel.1
Access Settings
Click your name in the bottom left corner of the WonkaChat dashboard, then select User Management. Only administrators can access user management functions.
2
Invite New Users
Send email invitations to users you want to add to your organization. Users receive an invitation link to create their account and join.
3
Assign Role
Choose whether the new user will be an Admin or a User when sending the invitation.
You can change user roles at any time after they join the organization.
4
Managing Existing Users
Change Roles
Change Roles
Promote users to administrators or remove admin privileges as responsibilities change.
Remove Users
Remove Users
Permanently remove users from your organization. While you can easily delete and re-add users, all data associated with the account is permanently deleted and cannot be recovered.
Role-Based Permissions
WonkaChat uses a simple two-role system for clear permission boundaries.Available Roles
User
Personal agent creationCreate their own personal AI agents
• Use agents shared by administrators
• Modify shared agents only if granted permission
• Access only the personal created agents or admin shared agents
• Use agents shared by administrators
• Modify shared agents only if granted permission
• Access only the personal created agents or admin shared agents
Users cannot share agents with others, only administrators can make agents available organization-wide.
Administrator
Full organizational controlManage all users (add, remove, change roles)
• Create, modify, and share agents organization-wide
• Control agent permissions (who can view/modify)
• Control MCP connections permissions
• Promote users to administrator roles\
• Create, modify, and share agents organization-wide
• Control agent permissions (who can view/modify)
• Control MCP connections permissions
• Promote users to administrator roles\
Admins have complete control except they cannot override other administrators’ privileges.
Agent Visibility Scope
- Personal Agents
Agents created by users are private by default and visible only to the creator.Users cannot share their personal agents organization-wide. Only administrators can share agents.
Sharing Agents
Administrators can share agents directly from the Agent Builder panel.- I'm an Administrator
- I'm a User
As an administrator, you control agent sharing from the Agent Builder panel.
How to Share an Agent
1
Open Agent Builder
Navigate to the agent you want to share (or create a new one) in the Agent Builder.
2
Configure Sharing Settings
In the Agent Builder panel, you’ll find sharing options: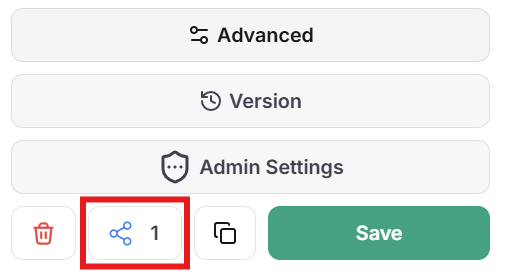
Agent Sharing location
- Share with the entire organization, or
- Share with specific users
- Viewer: Can view and use the agent (no modifications)
- Editor: Can view, use, and modify the agent
- Owner: Has full control including sharing and deletion
3
Review Tool Access
Before sharing, verify which tools and MCP connections the agent has access to. Ensure they’re appropriate for all users who will have access.
4
Save and Share
Save your sharing configuration. The agent immediately becomes available to the specified users based on the permissions you set.
Users will see the shared agent in their agent list and can start using it according to their granted permissions.
Tool Restriction
When creating an AI agent, you can control exactly which tools it has access to. This ensures agents only have the capabilities they need to perform their intended function.How Tool Restriction Works
When you add an MCP connection (like Outlook, GitHub, or Slack) to an agent, you can selectively enable or disable individual tools within that connection. For example, if you add the Outlook MCP connection to an agent:- You can keep tools like “draft email” and “read emails”
- You can remove tools like “send email” and “delete email”
Tool restriction happens at the agent creation level. Each agent can have different tool access based on its intended purpose.
Why Restrict Tools?
Prevent Unintended Actions
Prevent Unintended Actions
By removing tools that perform irreversible actions (sending emails, deleting files, deploying code), you eliminate the risk of agents making mistakes or misinterpreting prompts.Security through absence: If an agent doesn’t have the “send email” tool, it’s impossible for it to send an email (even by accident).
Minimize Risk Surface
Minimize Risk Surface
The fewer tools an agent has, the less can go wrong. Reduce the attack surface by giving agents only the specific capabilities they need.Example: A data analysis agent doesn’t need tools to modify or delete data. He should only receive read access.
Purpose-Built Agents
Purpose-Built Agents
Create specialized agents optimized for specific tasks by giving them precise tool sets.Example: A “Draft Email” agent with Outlook MCP but only drafting tools enabled. He should not receive any sending, deleting, or forwarding capabilities.
Example: Email Draft Agent
The difference between a helpful drafting assistant and a potential security risk often comes down to a single tool.- ✅ Good Example: Send Tool Disabled
- ❌ Bad Example: Send Tool Enabled
The same agent, but with the Without access to the
send-email tool restricted.The Result:send-email tool, the agent can only draft content. The user reviews it, makes changes if needed, and manually sends when ready.Safe: User maintains full control over when and what gets sent. Agent provides value without risk.
Safe Mode: Human-in-the-Loop
Safe Mode ensures you approve every action an AI agent wants to take before it executes.How Safe Mode Works
1
Identify When to Use Safe Mode
Enable Safe Mode for agents that perform high-risk operations:
- Send communications (emails, messages, posts)
- Modify or delete production data
- Deploy code or configurations
- Execute financial transactions
2
Agent Requests Action
When an AI agent wants to use a tool or execute an action, it pauses and requests your approval.You see exactly what the agent wants to do, which tool it wants to use, and what parameters it will pass.
3
You Review & Decide
Review the requested action and decide whether to:
- Allow: The action executes as requested
- Deny: The action is blocked, and the agent continues without executing it
4
Action Executes or Blocks
- If approved, the action executes and the agent receives the results
- If denied, the agent is informed the action was not permitted and can adjust its approach
You can disable Safe Mode for trusted agents performing routine tasks, but it’s recommended for agents with access to powerful tools.
Access Control Advices
Limit Administrators
Grant admin roles only to those who need full organizational control. Fewer admins = easier auditing and reduced risk.
Start Restrictive
Begin with minimal tool access and permissions, then add only as needed. It’s easier to grant access than to recover from mistakes.
Review Regularly
Periodically audit who has access to which agents and tools, adjusting as roles and responsibilities change.
Test with Safe Mode
Always test new agents with Safe Mode enabled to observe what actions they attempt before granting autonomous operation.